Or how we clean a Yuru Yuri page
This was written mainly as a record of how Dory cleaned a page of Yuru Yuri from a scanned tankoubon raw, with the intention that it would be useful for would-be Bakkin cleaners. I'm sure each cleaner will either already have, or is developing his or her own workflow, so this is just a reference of one way of doing it.
Most of this was done using Photoshop CC 2019 and with Photoshop terminologies. GIMP works, but the lack of non-destructive editing makes learning to clean a pain, as any mistake or after-the-fact adjustments often requires redoing a bunch of things.
A lot of these steps can also be automated as a set of Photoshop Actions, which is what I did, so that for all the pages in a volume I don't have to repeat a bunch of mundane tasks that are the same from page to page.
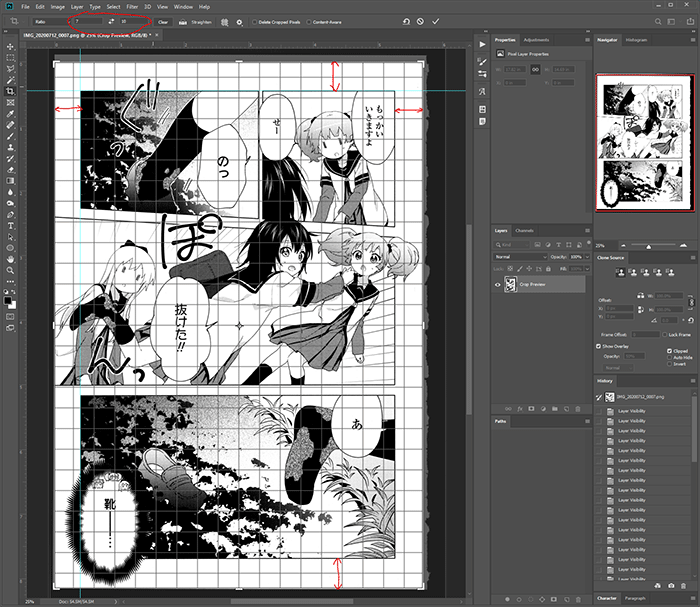
For this demonstration we will be using page 7 from Yuru Yuri chapter 144. This was scanned from the A5-sized Special Edition tankoubon, using a Canon 9000F mkII scanner at 600 dpi, outputting 8-bit monochrome PNG with a tiny bit of leveling applied, just so as to increase the dynamic range we have to work with.
Straightening the page
The first step is to make sure vertical lines are vertical and horizontal lines are horizontal. This is not just to align panel borders; having properly aligned horizontals and verticals will make redrawing easier later, especially around screentone, given how digital screentone dots are often either vertical, horizontal, or at 45° angle. Thus it pays to spend a little bit of time getting this right.
A exaggeraged page coming out of the scanner, after rotating to aligning vertical lines, and after skewing to also align horizontal lines.
 |
 |
 |
|---|
These demonstration images were taken from tabv's excellent cleaning guide.
Vertical alignment by rotating
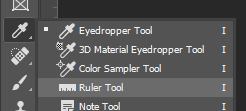
The way I do this is to use the Ruler Tool in Photoshop.
Place both ends of the ruler on a known, long vertical line, which is often a vertical panel edge that runs from top to bottom of a page, paying attention to which shade of gray I put my ruler on for both ends:
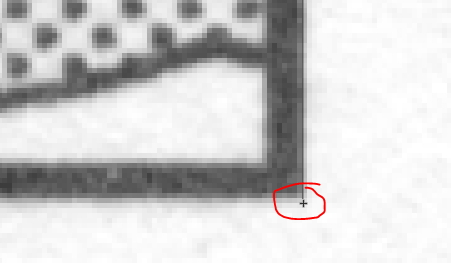
TIP: holding down Shift key while dragging one end of the ruler to the edge of the screen speeds up the panning.
Once both ends of the ruler are placed, simply go to Image → Image rotation → Arbitrary, and the correct angle and directly should already be entered automatically by Photoshop; just click OK.
Another way to find out the rotation values automatically can be found here
Horizontal alignment by skew transform
Often, due to limitation of printers and scanners, most pages in a tankoubon will be skewed slightly, but consistently. In my copy of volume 18 when scanned at 600dpi, that amounts to around 3 to 4 pixels off across a page after vertical alignment is done.
 |
 |
|---|
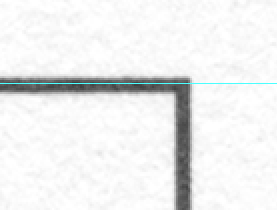
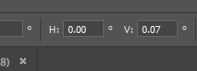
To fix that, I use Edit → Transform → Skew, and apply a Vertical skew value of 0.07° (for this tankoubon).
Cropping
Yuru Yuri Special Edition tankoubons are released on A5 size, which is 148 x 210mm. A little bit of paper area will be unusable around the gutter, so we at Bakkin decided to standardize crop to 7:10 aspect ratio. Pay attention to details close to the edges and don't crop too much off them but also don't leave too much that needs to be redrawn in later, as well as the margin around the panels and make sure they're somewhat balanced.
TIP: while cropping, I prioritize a balanced look, not cutting out the black edges. Generally, those can easily be filled in later.
This can also be automated.
Getting rid of the paper texture
You can see from the raw that the scanner picked up the paper texture as a sort of grainy background noise. We don't want that. The purpose of this step is to ensure that white areas on the page appear as pure white (RGB 255, 255, 255), and black areas are pure black (RGB 0, 0, 0).
Levels
Most of the work removing the paper texture is done with a simple tool called Levels. I use a Levels adjustment layer with Layer → New Adjustment Layer → Levels. There will generally be two large peaks in manga: one for the mostly-black pixels and one for the mostly-white pixels. Drag the black and white points just past those peaks should generally remove most of the paper textures.
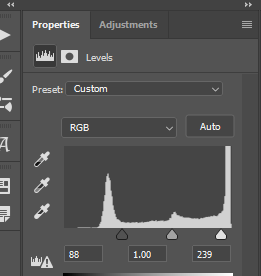
I will then go back and check dark shadow areas, especially at the end of a gradient screentone, like Ayano's pigtail, and bright areas, like flowery backgrounds, and make sure I have not decimated details in those areas. I generally don't like increasing the filter any further than 90% of the peaks since that will just make the page lose midtone details and look harsh.
Filters
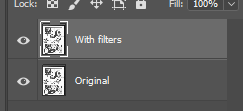
Another useful tool to help with removing some more paper texture is by using filters. Some common filters are Surface Blur, Smart Blur, Topaz Clean 3.
I start off by duplicating the original layer to a separate layer to apply the filter on. The reason for this will be clear later on.
TIP: Some filters only work with RGB images (not grayscale), so if a particular filter is grayed out, try Image → Mode → RGB Colors, and do not flatten the image (just ignore that scary warning).
The only filter I often use is Topaz Clean 3, and while it does get rid of some paper texture, the main purpose is to make panel edges less jaggy. My Topaz Clean parameters for this volume are:
- Clean Strength: 1
- Clean Radius: 8
- Clean Threshold: 0.38
- Edge Sharpness: 1
- Edge Radius: 1.5
- Edge Accent: 1
- Texture Strength: 0
Other cleaners have used Surface Blur, or just skipped this step altogether, with great success, so this is very optional.
Removing filters
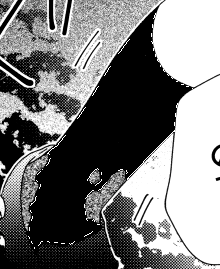
The biggest drawback of any filter applied is a loss of details. A filter that removes jagged edges of panels will tend to remove intentional jagginess; a filter that smoothes out paper texture will remove faint details, most often at edges of a gradient screentone. By flipping back-and-forth between the layer with and without Topaz Clean applied, I could see that some of the actual dirt on the ground was almost removed by the filter.

TIP: the "
Ctrl-," hotkey to toggle a layer on and off is very useful here.
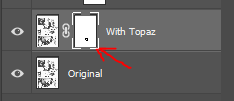
To fix that without sacrificing the rest of the benefit of my filters, I create a layer mask on the filter-only layer, created earlier. Then I could just use a paintbrush (or Eraser tool) and paint black on the mask in areas where I don't want the filters to apply.
Manual cleaning
There will still be areas where you can see traces of the texture, or dust from the page or the scanner glass that still show after leveling and filtering, and you cannot increase the levels or filter strength any more without killing subtle details. Here's where some manual work will be needed.
As always, I create a new cleaning layer, above the filtering layer but underneath the Levels adjustment layer and do all my work there so as not to affect the previous steps.
For large black areas, I find the Magic Wand Tool useful, as long as I keep an eye out for any gradient/transition areas and unselect them. For example, Yui's sock here should be all black, but there is still quite a bit of gray dots here and there. I would take the Magic Wand tool, set tolerance to ~9-10 or so, select it, then remove her shoes and muddy ground from the selection. Then I do Select → Modify → Contract and contract the selection by 3 pixels (to avoid damaging areas that should not be pure black), and fill in that selection with black.
Find other black areas, select, deselect bad areas, contract, fill, erase areas that should not be filled (mostly around Yui's hair gloss), rinse and repeat. Here's a video of how this looks in practice.
TIP: A short contract - fill - deselect Action, bound to a hotkey, speeds this up a ton.
Dust removal
At this point most of the page should look very good already, except for the occasional dust and scratched and lint and whatever was on the scanner glass. This part is as simple as picking up the Brush tool, find the dust spots, and stamp them out. As always, I do all my dusting on a separate layer.
TIP: I keep this layer below the Levels layer so that if I decide to change the levels later, the dusting would still seamlessly blend in with the rest of the page.
Dust on white or black background
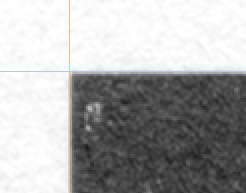
I could have just gone around the page looking for dust, but with dusting being the most boring part of manga cleaning, I wouldn't have found anything after 5 minutes max. A dusting aid would help immensely here. To find black specks on white background, I create a new layer on top of everything, fill it completely with black, set blending mode to Color Burn, and opacity to 80%. This makes any black mark stand out and I can stamp those out with a brush. Remember to turn off visibility to this layer when done.
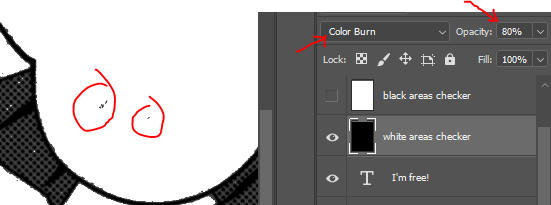
Similarly, to find white specks on black background, I use a new layer filled with white, blending mode Color Dodge, and also at 80% opacity.
Dust on screentones
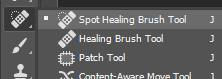
Sometimes you will find dust spots on screentones, which manifests as missing screentone "dots" or those "dots" get linked together. Viewed from a distance, those look like slightly brighter or darker areas on the screentones. The best way to deal with those that I found is to use the Spot Healing Brush tool, with Type set to Content-Aware and Sample All Layers on.
Photoshop's ML engine generally does a good job filling in the screentones, even gradient ones.
 |
 |
|---|
TIP: "
[" and "]" hotkeys change brush sizes; "{" and "}" change brush hardness.
At the end, I have something that looks like this, ready for redrawing.
