Or how we remove SFX on top of art
The whole purpose of this task is to remove all the sound effects that was put on top of artwork, so that we can put the English equivalient sound effect back, which often do not occupy the same space at their optimal typeset positions. A redrawer is successful when the reader could not tell which part was the original art and which was put in by him/her. Think of it as a basic form of "art restoration".
The tools
Since there are many ways to achieve the same result, the guide here is just one way of doing it. Here we use Photoshop, but GIMP had been used by our past member tabv to great success, and there's nothing preventing you from using Clip Studio Paint and just draw the whole page from scratch. That said, most people will find this a useful starting point.
The two tools that we use the most are the Pen Tool  (also called the Path Tool in GIMP) and the Clone Stamp Tool
  . Those two make up more than 90% of the time spent redrawing (with the rest 10% spent staring at the page wondering where to start).
Most of Yuru Yuri images (and indeed most manga) consist of two parts:
- Structural lines, that are lines drawn mostly by Namori herself, which are the outlines of characters, lines on clothings, hair, facial expressions, and edges of objects in the background. The Pen Tool will be used to redraw those lines.
- Fills, which can either be solid colors (e.g. Yui's hair, socks) or screentones, which used to be things that her assistant would need to cut out from a large screentone piece and paste onto the page, but is now done mostly digitally. The clone tool will be used for most of the screentone redraws.
Tip: Keeping the redrawing layers below the leveling layer will allow levels to be adjusted after redrawing without messing up the tones.
A little bit about the Pen Tool
TIP: Edit → Preferences → Tools, uncheck "Snap Vector Tools to Pixel Grid" makes the Pen Tool a lot less finicky to work with.
The Pen Tool may be intimidating at first if you have never used it before, but it is an indispensable part of a redrawer's repertoire. After mastering the pen tool, a redrawer would be ablehandle 95% of the SFX'es in Yuru Yuri. And while "How to use the Pen Tool" is a little too big of a topic for this post, there are many tutorials online that can help with that. Making Selections With The Pen Tool In Photoshop is an excellent tutorial for the absolute beginner. The Bezier Game is another excellent resource to help one practice.
TIP: With the Pen Tool, the key thing to keep in mind is the less number of nodes, the better. An S-bend can be made with only 2 nodes on the 2 ends.
Level 1
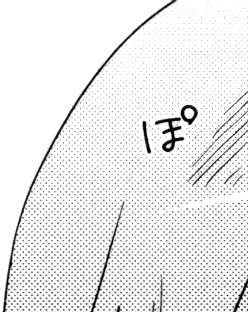
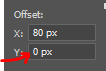
Assuming you have precisely straightened the page, some parts like horizontal/vertical features can simply be done with the clone tool: Alt-click on where you want to clone from, clicking on where you want to clone to, ensuring either vertical or horizontal offset is zero (depending on where you're cloning) and it should be seamless.
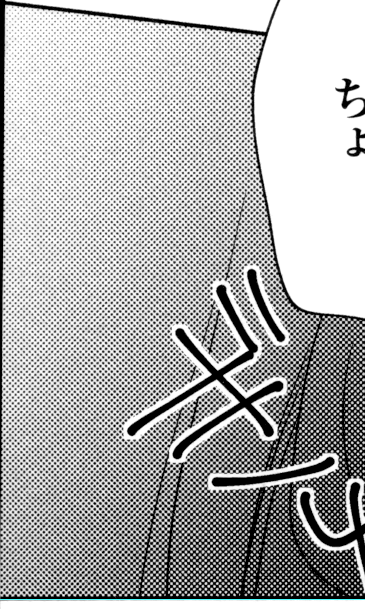
Other straight but slanted lines can also be done easily with the clone tool; just need to find the right transition.
Screentones that are uniform is also just a matter of lining up the dots with the clone tool.

Level 2
Often you'll find screentones that are not uniform, but a gradient, like Chinatsu's hair here:
This is where making sure the panels are absolutely straight during cleaning earlier will help immensely: the majority of non-uniform screentones that Namori used are either horizontal or vertical gradients. With the pages straightened, you can just take the clone tool, making sure the vertical offset (in this case of a vertical gradient screentone) is zero, align the dots on the horizontal offset, and paint away. Since Namori used digital screentones, all the dots will be perfectly aligned vertically and horizontally.

Tip: Keep the Clone Source panel open while cloning.
Sometimes things get a little more tricky, where the screentone is a gradient, but it's neither vertical nor horizontal. In this case, we have a gradient on Ayano's hair that's around 60°.
This is where you'll just have to find out what the gradient angle is, and which clone offset to use so that both the dots and the gradient match. This can be a little tricky, so experiment, and keep your hand on that Ctrl-Z.
Tip: Temporarily turning off the leveling layer can help finding the spot that matches the gradient.
Level 3
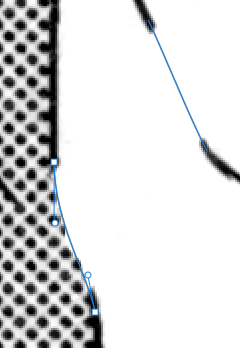
We'll use the Pen Tool to literally "re-draw" the structural lines. We'll start by tracing a path where we think the original art's line would be:
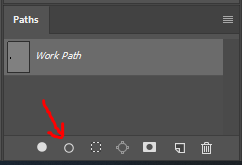
Then we'll take the Brush Tool  , adjust the size/hardness/flow/opacity as needed (which involves experimentation and lots of undo's!) then click the Stroke Path button in the Path panel to apply the brush along the path.
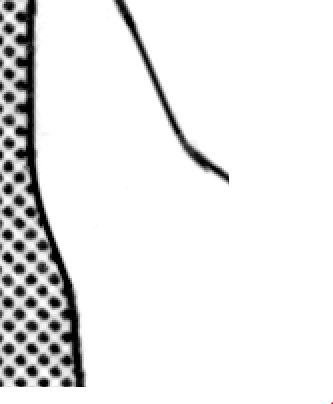
And with that we're done! The page is now completely free of Japanese text, ready to be typeset.